Welcome to the Support Centre for

HomeControl2.0

This page contains links to our tutorial videos and set-up guides as well as frequently asked questions regarding HomeControl2.0.

Video Tutorials

Useful Product Pages

Enforcer Euro 46 DoorbellCam BatteryCam

FAQs

  • Cloud and Panel

    HomeControl2.0 displays ‘Please check with Administrator to grant the permission.’ What should I do?

    Permission to connect to a panel must be given via the Cloud. Contact the Cloud account holder and request that they permit your device to connect.

    How do I get my user code?

    The user code is the same code that is used to arm/disarm the system at a keypad. If you do not know your user code, this can be changed in the Master Manager menu. Again, if the Master Manager code is not known, please speak to your installation company as the Master Manager code can be changed via the Engineer menu.

    I have lost or forgotten my app password, how can I retrieve it?

    You can check the app password in the Master Manager Menu of the control panel.

    1. Press the ‘D’ key then enter the Master Manager Code.
    2. Press ‘NO’ until ‘SET UP APP DATA?’ is displayed then press YES
    3. Continue to press ‘YES’ until ‘App Password’ is displayed and make a note of it.
    4. Repeatedly press ‘NO’ until ‘EXIT MANAGER MENU?’ is displayed and press ‘YES’ to return to day mode
  • Battery Camera

    How do I add a BatteryCam to the HC2.0 app?

    1. Click the ‘+’ button at the bottom of the screen.
    2. Select ‘Add video doorbell/camera’.
    3. Select ‘Battery camera’.
    4. Enter the details of the network.
    5. Please note: This must be a 2.4GHz network.
    6. Select ‘Continue’ and then ‘Confirm’.
    7. Point the BatteryCam at the screen of the smart device.
    8. Once the BatteryCam “beeps” press ‘I Heard a Prompt’.
    9. Wait whilst the BatteryCam pairs.
    10. Once it has paired, tap ‘Finish’.


    Why can’t I see the BatteryCam in the app after adding it?

    The BatteryCam will not appear on the app if the user is not logged into their account. Go into ‘Settings’ and check that HomeControl2.0 is logged into the PyronixCloud account the BatteryCam was paired to.

    Can the BatteryCam be powered by a wire?

    The BatteryCam must be fully charged with USB cable and plug provided before use, and then recharged when required thereafter.

    Alternatively it can be coupled with the Solar Panel to continually charge if used outdoors.

    How long does it take to charge the BatteryCam?

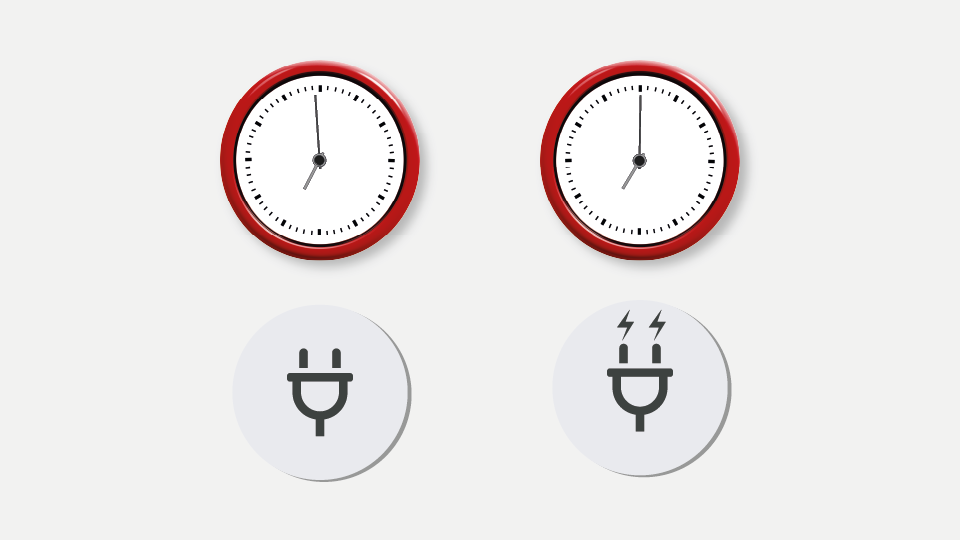
    The BatteryCam takes 4- 6 hours to charge.

    What is the battery life of the BatteryCam once fully charged?

    Up to 12 months on standby and around four months with wake up 10 times a day.

    Does the BatteryCam have night vision?

    Yes and these options can be altered in the settings menu on the app.

    Why does the BatteryCam camera only work on 2.4GHz network?

    Typical broadband Wi-Fi networks operate on 2 separate frequencies, 5GHz and 2.4GHz. 5GHz operates at faster data transmission speeds, but provides less coverage and is less stable. The wireless chips in the BatteryCam are compatible with 2.4GHz only. As the BatteryCam does not require a high data transmission, this is the better of the 2 bandwidths for the job.

    What SD cards are compatible with the device?

    Most MicroSD cards will work, however it is recommended a class 10 U1/U3 MicroSD card for best results. The max size is 128GB.

    How do I reset the BatteryCam?

    The BatteryCam can be reset by pressing and holding the reset button on the back of the BatteryCam until a tone is heard.

    How do I set up motion sensitivity for the BatteryCam?

    To set up motion sensitivity on the BatteryCam open the HomeControl2.0 app, press on the BatteryCam icon to start live-viewing, then select the two up arrows. Choose ‘PIR’ then select the motion sensitivity level, or disable the feature if required.

    How do I share a BatteryCam on the app?

    Owner

    1. Open and view the BatteryCam.
    2. Select the arrows in the bottom corner to view the menu and select ‘Settings’.
    3. Select ‘Share device’ from the menu.
    4. Enter the person’s PyronixCloud email address and tap ‘+’.
    5. Send the generated sharing code to the recipient.

    Recipient

    1. Click the ‘+’ button at the bottom of the screen.
    2. Select ‘Add video doorbell/camera’.
    3. Select ‘Add shared device’.
    4. Enter the sharing code sent by the owner and press submit.
    5. Tap ‘<’ to return to the previous screens.
    6. The BatteryCam will now appear on the main screen.


    What is the PIR range on the BatteryCam?

    The range of the PIR is 9 metres.

    How do I playback footage from the BatteryCam?

    To playback footage, first open the HomeControl2.0 app and press on the ‘BatteryCam icon’ to start live-viewing. Once viewing, select the two up arrows and choose ‘Recordings’. From here, a date in the calendar can be chosen to view recordings for a specific date, or the timeline slider can be utilised to select a recording. The recorded videos will show as a blue bar.

    Why is there no feed or notification from my BatteryCam when it detects motion?

    This could be any of the following reasons:

    • Poor Wi-Fi connection to BatteryCam
    • Power to BatteryCam (solar power or battery)
    • Poor signal to smart device
    • Not signed into PyronixCloud account on HomeControl2.0
  • Doorbell Camera

    How do I add a doorbell to the HC2.0 app?

    1. Click the ‘+’ button at the bottom of the screen.
    2. Select ‘Add video doorbell/camera’.
    3. Select ‘Doorbell’.
    4. Enter the details of the network.
    5. Please note: This must be a 2.4GHz network.
    6. Select ‘Continue’ and then ‘Confirm’.
    7. Point the Doorbell at the screen of the smart device.
    8. Once the Doorbell “beeps” press ‘I Heard a Prompt’.
    9. Wait whilst the Doorbell pairs.
    10. Once it has paired, tap ‘Finish’.


    Why can’t I see the Doorbell in the app after adding it?

    The Doorbell will not appear on the app if the user is not logged into their account. Go into ‘Settings’ and check that HomeControl2.0 is logged into the PyronixCloud account the Doorbell was paired to.

    Can the doorbell be powered by a wire?

    Yes the device can be wired with 12-24VAC to provide power.

    What is the battery life of the Doorbell once fully charged?

    The battery in the Doorbell is a 6700mAh battery which typically has a standby time of 10 months. If the device is woken up 10 times per day, it will need recharging every 3 months (approximately).

    Can the Doorbell be charged whilst on its base?

    No as it can only be charged via the USB cable provided. In order to insert the cable, the device requires removing from the base.

    Does the Doorbell have night vision?

    Yes and these options can be altered in the settings menu on the app.

    Why does the Doorbell camera only work on 2.4GHz network?

    Typical broadband Wi-Fi networks operate on 2 separate frequencies, 5GHz and 2.4GHz. 5GHz operates at faster data transmission speeds, but provides less coverage and is less stable. The wireless chips in the Doorbell are compatible with 2.4GHz only. As the Doorbell does not require a high data transmission, this is the better of the 2 bandwidths for the job.

    What SD cards are compatible with the device?

    Most MicroSD cards will work, however it is recommended a class 10 U1/U3 MicroSD card for best results. The max size is 128GB.

    How do I reset the doorbell?

    You can reset the doorbell by pressing and holding the reset button on the back of the doorbell until a tone is heard.

    Can I alter the volume on the doorbell?

    No, the doorbell only has one setting.

    How do I pair the chime to the doorbell?

    1. To enter pairing mode, press the pairing button for 2 seconds and the status LED will flash red slowly.
    2. Press the doorbell button to pair. To indicate a successful pairing, the red LED will stop flashing and the ringtone will play on the Chime.


    How do I adjust the chime settings (volume, melody options)

    These are adjusted with the relevant buttons on the device. For more information please the user guide.

    How do I un-pair the chime from the doorbell?

    The doorbell can be unpaired by deleting it in the app.

    How many chimes can be added to the doorbell?

    Up to 4 chimes can be added to the doorbell.

    How many doorbells can be added to a chime?

    You can add 2 doorbells to 1 chime.

    How do I share a doorbell on the app?

    Owner

    1. Open and view the doorbell.
    2. Select the arrows in the bottom corner to view the menu and select ‘Settings’.
    3. Select ‘Share device’ from the menu.
    4. Enter the person’s PyronixCloud email address and tap ‘+’.
    5. Send the generated sharing code to the recipient

    Recipient

    1. Click the ‘+’ button at the bottom of the screen.
    2. Select ‘Add video doorbell/camera’.
    3. Select ‘Add shared device’.
    4. Enter the sharing code sent by the owner and press submit.
    5. Tap ‘<’ to return to the previous screens.
    6. The Doorbell will now appear on the main screen.


    What is the PIR range on the doorbell?

    The range of the PIR is 5 metres.

    Why is there no feed or notification from my doorbell when it is pressed?

    This could be any of the following reasons:

    • Poor Wi-Fi connection to Doorbell
    • Power to Doorbell (wired power in or battery)
    • Poor signal to smart device
    • Not signed into PyronixCloud account on HomeControl2.0
  • Personal Help Alarm

    Why is my SOS button not showing in the app?

    This could be any of the following reasons:

      • A bubble has not been created (this includes the invitation being accepted by the recipient)
      • Not signed into PyronixCloud account on HomeControl2.0


    Why can’t I add an SOS widget?

    This could be any of the following reasons:

      • A bubble has not been created (this includes the invitation being accepted by the recipient)
      • Not signed into PyronixCloud account on HomeControl2.0


    How do in invite other users to my bubble?

    1. Click the ‘+’ button at the bottom of the screen.
    2. Select ‘Set up your Personal Help Alarm’.
    3. Click the ‘+’ button to add a person to your bubble.
    4. Enter the person’s PyronixCloud email address.
    5. Tap ‘Add’.
    6. People in your bubble appear at the top under ‘My Bubble’.
    7. Bubbles you are part of appear further down under ‘External Bubbles’.
    8. Tap ‘<’ to return to the previous screens.
    9. To send a personal help alarm signal, press and hold the SOS button at the bottom of the main screen.

    Please see the following video: https://youtu.be/JLtmQjGcMzA

    What if the other user doesn’t have an account?

    They will need to create one.

    How do I create an account?

    Select the ‘+’ button then select the option to add the Personal Help Alarm then you will be prompted to create an account.

  • SmartPlug

    How do I add a SmartPlug?

    1. Click the ‘+’ button at the bottom of the screen.
    2. Select ‘Add new smart device’.
    3. The SmartPlug power LED must be flashing slowly, if not ensure SmartPlug is plugged into a power source, then press and hold the Power Button for 5 seconds.
    4. Select ‘SmartPlug’.
    5. Verify the network details are correct.
    6. Please note: This must be a 2.4GHz network.
    7. Make sure that “AP Mode” is displayed in the top right corner. If “EZ Mode” is displayed, tap on the two arrows above to switch between modes.
    8. Tap the “continue” button.
    9. Do not click “Confirm”, leave this on the screen on the app and go into your Wi-Fi settings.
    10. Connect directly the SmartPlug hotspot.
    11. Once connected, return to HomeControl2.0
    12. Now, click “Confirm”.
    13. Once the device has finished pairing, click “Finish”.

    Please see the following video: https://youtu.be/r-qlWSRfd4Q

    How do I set up an automation?

    1. Click add and then ‘Automation’ from the list.
    2. Select ‘Schedule’.
    3. Configure the execution time of the automation and the daily frequency of when it should occur then tap ‘Continue’.
    4. Select ‘Run the device’* to choose a smart device to action at the specified time and days.
    5. Select the smart device from the list to function in the automation.
    6. Select ‘Switch’ and then whether the device is to switch on or off at the specified time.
    7. Give the automation a name and a colour so that it can be identified on the app.
    8. Tap ‘Finish’ to finalise the automation.

    *Alternatively, a scene can be selected to automatically run

    Please see the following video: https://youtu.be/cMxPPXHMDBI

    How do I set up a scene?

    1. Click add and then ‘Automation’ from the list.
    2. Select ‘Schedule’.
    3. Configure the execution time of the automation and the daily frequency of when it should occur then tap ‘Continue’.
    4. Select ‘Run the device’* to choose a smart device to action at the specified time and days.
    5. Select the smart device from the list to function in the automation.
    6. Select ‘Switch’ and then whether the device is to switch on or off at the specified time.
    7. Give the automation a name and a colour so that it can be identified on the app.
    8. Tap ‘Finish’ to finalise the automation.

    *Alternatively, a scene can be selected to automatically run

    Please see the following video: https://youtu.be/y8LjMF2c044

    What is the difference between an automation and a scene?

    An automation is a pre-programmed event that will operate without the need to be triggered by the end user whereas a scene has to be triggered manually by the user to begin.

    Why does the SmartPlug only work on 2.4GHz network?

    Typical broadband Wi-Fi networks operate on 2 separate frequencies, 5GHz and 2.4GHz. 5GHz operates at faster data transmission speeds, but provides less coverage and is less stable. The wireless chips in the SmartPlugs are compatible with 2.4GHz only. As the SmartPlugs do not require a high data transmission, this is the better of the 2 bandwidths for the job.

    What is the difference between AP mode and EZ mode?

    AP mode is the most reliable method of connecting to the network as the device is manually connected to in order to enter the Wi-Fi details. A SmartPlug will indicate it is in AP mode by flashing slowly.

    If the device is in EZ mode, it will be flashing fast and connects to the network through the app without intervention.

    What amp rating is the SmartPlug?

    It is capable of a 13A load maximum.